How to Make Bakery-Style Raspberry Cream Chocolate Cups Easily
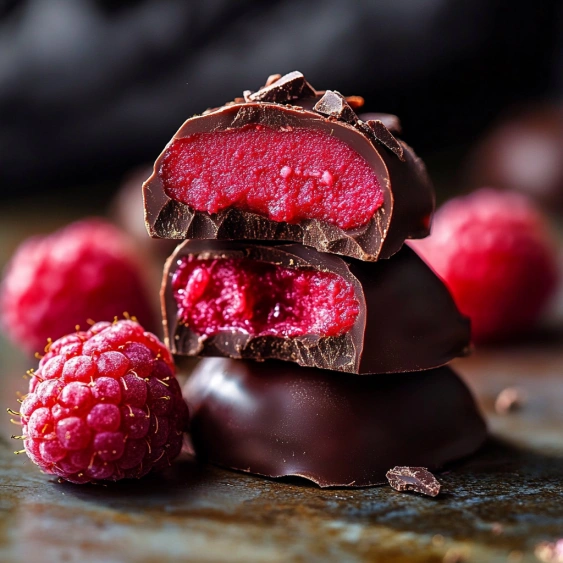
Imagine biting into a rich, dark chocolate shell, yielding to a lusciously smooth, tangy-sweet raspberry cream filling. It’s the kind of exquisite experience you’d expect from a high-end patisserie, yet it’s entirely achievable in your own kitchen with surprising ease. If you're searching for a show-stopping dessert that combines sophistication with simplicity, these homemade bakery-style raspberry cream chocolate cups are your ultimate answer.
Inspired by the beloved classic peanut butter cup, this recipe elevates the concept with an irresistible pairing of chocolate and vibrant raspberry. There’s no complex equipment or intimidating techniques involved – just pure chocolate bliss waiting to be created. Whether you're a seasoned baker or a kitchen novice, these elegant individual treats promise to impress with minimal fuss. Get ready to transform simple ingredients into decadent
chocolate raspberry cream candy cups that taste like they came straight from a gourmet bakery!
Unveiling the Magic: Why Raspberry Cream Chocolate Cups are Your Next Dessert Obsession
The appeal of raspberry cream chocolate cups extends far beyond their delightful taste. They represent a perfect marriage of convenience, versatility, and undeniable luxury. Here’s why they’re poised to become your new favorite sweet indulgence:
- Decadence Without Difficulty: Many impressive desserts come with a long list of steps and specialized tools. Not these. The process is straightforward: melt chocolate, spoon, fill, spoon, chill. The resulting "oohs" and "aahs" from your guests will belie the minimal effort you put in.
- A Symphony of Flavors: The combination of robust chocolate – whether dark, milk, or a blend – with the bright, slightly tart notes of raspberry creates a harmonious balance. The creamy filling acts as a delightful counterpoint to the snap of the chocolate shell, offering a multi-textured experience.
- Visually Stunning: These individual cups are miniature works of art. Their neat, elegant presentation makes them an eye-catching addition to any dessert table, perfect for dinner parties, brunches, or special celebrations like Valentine’s Day.
- Perfectly Portioned Indulgence: Each chocolate cup offers a satisfying single serving, making portion control a breeze and ensuring everyone gets their own little piece of heaven.
- Incredible Versatility & Make-Ahead Charm: They are excellent for a multitude of occasions, from a casual treat to an elegant post-dinner delight. Even better, these are a fantastic make-ahead option. You can prepare them days in advance and store them in the fridge or freezer, making entertaining stress-free. They also make thoughtful, homemade gifts! To learn more about their gifting potential, check out our guide on Make-Ahead Raspberry Chocolate Cups: Perfect Gifts & Party Desserts.
Gather Your Tools: Essential Ingredients and Equipment for Success
Before you dive into crafting these delectable
chocolate raspberry cream candy cups, let's ensure you have everything you need. Quality ingredients are key to achieving that bakery-style flavor and texture.
Key Ingredients:
- Chocolate: This is your foundation. For a truly rich, bakery-quality experience, opt for good quality chocolate bars or callets (couverture) rather than chocolate chips, which often contain stabilizers that prevent smooth melting.
- Dark Chocolate (60-75% cocoa): Offers a deep, intense flavor that beautifully contrasts the sweet raspberry.
- Milk Chocolate: For a sweeter, creamier profile that's universally loved.
- White Chocolate: A delicious alternative or for decorative swirls, providing a different flavor dimension.
You'll need roughly 10-12 ounces (280-340g) of chocolate, depending on the size of your cups.
- Fresh Raspberries: Essential for the vibrant flavor and natural color of the cream. You'll need about 1 cup for the filling. Frozen raspberries can work, but ensure they are fully thawed and patted dry to avoid excess moisture.
- Heavy Cream: The base for your luscious, smooth filling. Full-fat heavy cream is crucial for stability and richness.
- Powdered Sugar (Confectioners' Sugar): To sweeten the cream and ensure a silky-smooth texture without graininess.
- Vanilla Extract: A touch enhances the overall flavor profile.
- Optional (for extra flavor/texture): A tiny pinch of salt to balance sweetness, a squeeze of lemon juice to brighten the raspberry, or even a tablespoon of raspberry liqueur for an adult twist.
Essential Equipment:
- Muffin/Cupcake Liners: Standard paper or foil liners are perfect. Silicone liners also work wonderfully for easy release. You'll need approximately 12-18 liners, depending on how full you make each cup.
- Muffin Tin: To hold the liners upright as the chocolate sets.
- Microwave-Safe Bowls or Double Boiler: For melting the chocolate gently.
- Small Saucepan: For gently warming raspberries (if making a compote base).
- Fine-Mesh Sieve: To remove raspberry seeds for an ultra-smooth cream.
- Electric Mixer (Handheld or Stand) or Whisk: To whip the heavy cream.
- Rubber Spatula or Spoon: For mixing and transferring ingredients.
- Small Spoon or Pastry Bag: For portioning the chocolate and filling into the liners.
Crafting Perfection: A Step-by-Step Guide to Your Bakery-Style Chocolate Raspberry Cream Candy Cups
Now for the fun part! Follow these simple steps to create your own professional-looking and tasting raspberry cream chocolate cups.
Step 1: Prepare Your Chocolate Shells
- Line Your Muffin Tin: Place your paper or silicone liners into a standard 12-cup muffin tin. This provides stability for your chocolate cups.
- Melt the Chocolate: Break your chosen chocolate into small, uniform pieces.
- Microwave Method: Place chocolate in a microwave-safe bowl. Heat in 30-second intervals, stirring well after each, until mostly melted and smooth. Be careful not to overheat, as chocolate can seize.
- Double Boiler Method: Place chocolate in a heatproof bowl set over a saucepan of simmering water (ensure the bowl doesn't touch the water). Stir constantly until melted and smooth.
- Create the Bottom Layer: Spoon about 1-1.5 tablespoons of melted chocolate into the bottom of each liner. Using the back of the spoon, spread the chocolate up the sides of the liner slightly, creating a shallow cup. This creates the essential chocolate casing.
- Chill to Set: Transfer the muffin tin to the refrigerator and chill for 10-15 minutes, or until the chocolate is firm to the touch.
Step 2: Prepare the Luscious Raspberry Cream Filling
- Prepare Raspberries: In a small bowl, gently mash your fresh raspberries. For an exceptionally smooth, seedless cream (like you'd find in a bakery), press the mashed raspberries through a fine-mesh sieve to remove the seeds. Collect the smooth raspberry purée. You should have about 1/2 cup of purée.
- Whip the Cream: In a clean, chilled bowl, combine the heavy cream, powdered sugar, and vanilla extract. Using an electric mixer on medium-high speed (or a whisk), beat until soft peaks form. Be careful not to over-whip, or it will become grainy.
- Fold in Raspberry: Gently fold the raspberry purée into the whipped cream until just combined. The cream should have a beautiful pink hue and be light and airy. If desired, taste and adjust sweetness.
Step 3: Assemble and Finish Your Chocolate Raspberry Cream Candy Cups
- Fill the Cups: Remove the chilled chocolate shells from the refrigerator. Spoon or pipe the raspberry cream filling into each chocolate cup, leaving a small gap (about 1/4 inch) from the top edge. Ensure the filling is relatively even.
- Cap with More Chocolate: Re-melt any remaining chocolate if it has hardened. Carefully spoon or drizzle another 1-1.5 tablespoons of melted chocolate over the raspberry cream filling, spreading it gently to cover the filling completely and meet the edges of the bottom chocolate layer.
- Final Chill: Return the muffin tin to the refrigerator and chill for at least 30-60 minutes, or until the chocolate is completely firm.
- Serve and Enjoy: Once fully set, gently peel away the paper liners. Your bakery-style raspberry cream chocolate cups are ready to be savored!
Elevate Your Treat: Expert Tips, Variations, and Storage Secrets
To truly make your
chocolate raspberry cream candy cups shine, consider these additional tips and creative variations:
Tips for Perfection:
- Chocolate Tempering (Optional): For a professional, glossy finish and a satisfying snap, you can temper your chocolate. This is a more advanced technique but prevents blooming (white streaks) and allows chocolate to set at room temperature. If you're not tempering, keep them chilled!
- Smooth Sides: When spreading the first layer of chocolate, use the back of a small, warmed spoon to gently push the chocolate up the sides of the liner. This creates a clean "cup" shape.
- Neat Tops: When adding the top layer of chocolate, drizzle it from the center outwards, gently spreading to the edges. A small offset spatula or the back of a spoon works well. Lightly tapping the muffin tin on the counter can help smooth the chocolate and remove air bubbles.
- Seedless for Silkiness: For a truly luxurious, seed-free filling, don't skip pressing the raspberry puree through a sieve. It makes a significant difference in texture.
- Piping Bag for Precision: For a cleaner filling process and more consistent portions, transfer your raspberry cream to a piping bag (or a Ziploc bag with a corner snipped off) before filling the chocolate shells.
Creative Variations:
- White Chocolate Raspberry Cups: Use white chocolate for both layers for a sweeter, creamier, and visually striking treat.
- Mixed Berries: Experiment with other berries like blueberries, strawberries, or a mix, either pureed or finely chopped and folded into the cream.
- Nutty Crunch: Sprinkle a tiny amount of finely chopped pistachios or almonds on top of the unset chocolate cap for added texture and visual appeal.
- Chocolate Drizzle: After the cups are set, drizzle contrasting melted chocolate (e.g., white chocolate over dark, or vice versa) for a decorative flourish.
- Spiced Cream: A tiny pinch of cardamom or a drop of rosewater in the raspberry cream can add an exotic twist.
Storage Secrets:
- Refrigeration: Store your chocolate raspberry cream candy cups in an airtight container in the refrigerator for up to 5-7 days. Allow them to sit at room temperature for 10-15 minutes before serving for optimal flavor and texture.
- Freezing: For longer storage, place the cups in a single layer in an airtight container or freezer bag, separated by parchment paper, and freeze for up to 1 month. Thaw in the refrigerator overnight or at room temperature for about 30 minutes before enjoying.
Conclusion
Crafting these bakery-style raspberry cream chocolate cups is an incredibly rewarding experience. With minimal effort, you can create a dessert that rivals anything found in a high-end bakery – a perfect fusion of rich chocolate and vibrant raspberry cream. They're not just a treat for the taste buds but a feast for the eyes, ideal for gifting, impressing guests, or simply indulging yourself. So, gather your ingredients, follow these simple steps, and prepare to delight in the magic of homemade chocolate raspberry cream candy cups. Your next dessert obsession awaits!